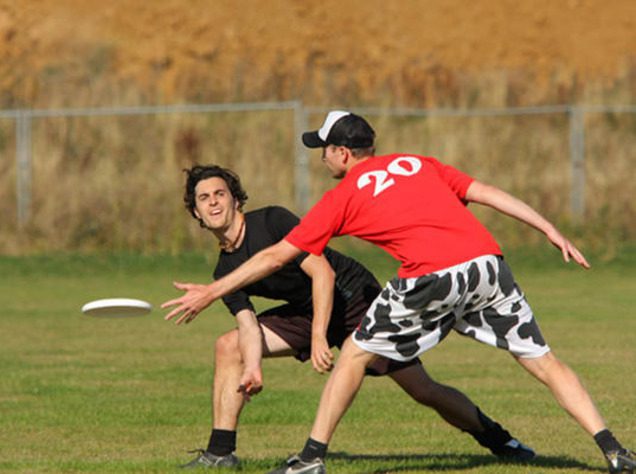
Now that you’ve mastered the backhand, it’s time to move onto a resourceful tool called the forehand. Affectionately nicknamed the flick, thanks to the necessary motion of the wrist, athletes all around the world have fallen in love with the inherent smoothness of a well-oiled forehand, will you be next? The forehand offers great opportunities both high and low for anybody looking to hit a cutter on their throwing arm side. Otherwise, without the forehand, defenders more effectively shut down portions of the field. So, if you’re looking to add a little bit of unpredictably to your offensive game, look no further!
Grab our tips, a partner, and get working — as is the case with most things on this Earth, good things come to those who work hard. And, in the case of improvement, learning and evolving as a throwing threat in Ultimate boils down to trial and error. CoachUp is proud to share our favorite tips, strategies, and grips in order to get you on the fast track towards success, but after you’ve nailed these, don’t be afraid to change it up! Ultimate excels once players are willing to move past their comfort zone and expand their game. So, why not you next?

The Beginning
Using your left foot as the pivot, it’s time to set-up your grip. Of course, any great throw starts with the grip and the forehand is no different. To begin, make your throwing hand into the classic imaginary gun formation — for those unfamiliar, stick your thumb, index, and middle fingers straight up and hold them there. Then, grab the disc and slide it in between your index finger and thumb, placing your thumb on top and the two fingers pressed tightly against the inside of the rim. Stack your ring and pinky underneath the bottom of the disc for added steadiness and support. Believe it or not, that’s it — we promise!
The Middle
Now, this is where the tricky part of the throw comes in, but stay with us. In the backhand article, we outlined how important it was to throw it on straight and level plane. That ideal still applies here, however, the forehand does not naturally lend itself towards easily finding that flat line to throw on thanks to the angles the arm and elbow make. Thusly, it can be difficult for beginner’s to find a happy medium between that flatness and arm power. So, before you try to get into any complicated motions, try pretending that your elbow is explicitly connected to your hip. Firmly place your elbow on the hip and try to leave it there at all costs. Doing so, of course, means that your arm power will be greatly diminished — and that’s good news!
By taking these steps slow, you’ll learn the overall basis for throwing without getting too far ahead of yourself. At the crux of the forehand is a great flick of the wrist, but people get too caught up in velocity and force before form and that’s a huge misstep for beginners. Focus on the form, staying flat, and flicking the wrist and you’ll have a great foundation in no time. Slowly but surely, you can start moving your elbow further and further away from the hip, adding power when appropriate. The flick is just a snap of the wrist and almost nothing more, so worry about the arm action later on.
The End
Again, you’ll want to figure out just when exactly is the right time to release the disc, but it’s an incredibly delicate process. With the forehand in particular, things can go sour really quickly — it’s actually quite similar to the process that quarterbacks go through while throwing, so we’ll quote it here as well:
If you don’t think a few degrees left or right makes a difference, think again about the nature of angles. A throw at ten yards that is left or right of the target by 1 degree will be off by 1.7 yards, or about 5 feet. However, take the distance of a throw of 20 yards, and the QB will miss it by 10 feet. From 40 yards away, the QB will miss his target by 20 feet, or almost 7 yards. Considering a throw from the middle of the field to the sideline is over 25 yards alone and a QB will usually throw about 7 yards behind the line of scrimmage, a simple 10-yard curl becomes a 30 yard throw — just 4 degrees off, and you miss badly.
Although it’s simply impossible to be perfect with every throw you make, it’s important because it reinforces good habits and technique. Your throw may be the game-winning point or game-losing interception, so it’s best to put your focus into every attempt. Finally, as always, be sure to follow-through on your throw. With the forehand, it can be tough to hit your target during the initial stages, but a good follow-through will help turn that shaky disc into a fast and firm huck with pinpoint accuracy.
(Related: Read about making effective deep cuts here.)
Huddle Up
Once you’ve confidently climbed this mountain, congratulations are in order! Learning the backhand and forehand aren’t particularly easy tasks for those newcomers, but from here on out, it’ll be quick evolving for those that took their time acing these fundamental throws. Believe it or not, most everything in Ultimate is built off these two throws, so an early understanding of the nuances will prove to be a major advantage, so congrats for getting that edge! An accurate forehand is practically unstoppable, so learn what works best for you and roll with it. Once you’re comfortable with the basic steps, feel free to make the throw your own!
However, learning the forehand can be a particularly difficult task for a majority of beginners, so don’t be afraid to reach out for guidance. The CoachUp team is full of kind, knowledgable athletes just waiting to pass their forehand secrets down to a new generation of athletes. Our team will have you hucking the disc with more accuracy and power than ever — what are you waiting for?
(Thanks to Major League Ultimate for the gif!)
Be prepared for the biggest moments by mastering the small ones off the field.
How useful was this post?
Click on a star to rate it!
Average rating 0 / 5. Vote count: 0
No votes so far! Be the first to rate this post.


